電卓を作ろう【レイアウト作成編】
本日から電卓を作っていきます!
今回はレイアウト編ということで画面を作っていきます!
新しいプロジェクトを作って0から開始します!
1. TableLayoutでボタン配置
電卓のボタン配置にはTableLayoutを使っていきます。
Tableの名の通り、マス目のようにレイアウトを作っていけます。
とりあえずボタンだけ配置したのがこちら!

ここから見た目を調整していきましょう!
2. レイアウトの調整
まずは、1段目のボタンを右に寄せたいです。
layout_columnという属性で、左からの何列目に配置するかを指定できるようです。
<Button
    android:id="@+id/clear"
    android:layout_width="wrap_content"
    android:layout_height="wrap_content"
    android:layout_column="2"
    android:text="C" />

<Button
    android:id="@+id/clearall"
    android:layout_width="wrap_content"
    android:layout_height="wrap_content"
    android:layout_column="3"
    android:text="CA" />
1列目を0として、1つずつ増えていきます。
なので、"C"には layout_columnに2を設定し、"AC"にはlayout_columnに3を設定します。
次に画面右側に余白が出来てしまっているので、幅を調整します。
layout_widthに0dpを設定し、layout_weightに1を設定することで
画面の幅いっぱいにボタン幅が調整できます。
<Button
    android:id="@+id/clear"
    android:layout_width="0dp"
    android:layout_weight="1"
    android:layout_height="wrap_content"
    android:layout_column="2"
    android:text="C" />

<Button
    android:id="@+id/clearall"
    android:layout_width="0dp"
    android:layout_weight="1"
    android:layout_height="wrap_content"
    android:layout_column="3"
    android:text="CA" />
これを全部のボタンに設定します。

すると、あれ1段目のボタン幅が広がってる・・・。
どうにもならないので、空文字のTextViewを突っ込んでむりやり揃えました。
もっといい方法がありそう・・・。
(これによりlayout_columnも指定の必要がなくなりました汗)
<TextView
    android:id="@+id/dummy"
    android:layout_width="0dp"
    android:layout_weight="1"
    android:layout_height="wrap_content"
    android:text="" />

<TextView
    android:id="@+id/dummy2"
    android:layout_width="0dp"
    android:layout_weight="1"
    android:layout_height="wrap_content"
    android:text="" />

<Button
    android:id="@+id/clear"
    android:layout_width="0dp"
    android:layout_weight="1"
    android:layout_height="wrap_content"
    android:layout_column="2"
    android:text="C" />

<Button
    android:id="@+id/clearall"
    android:layout_width="0dp"
    android:layout_weight="1"
    android:layout_height="wrap_content"
    android:layout_column="3"
    android:text="CA" />

3. 表示エリアを配置
ボタンの上に数字の表示エリアを定義してます。
今回は右寄せで表示するようにgravityにrightを指定します。
<TextView
    android:id="@+id/calc"
    android:layout_width="match_parent"
    android:layout_height="wrap_content"
    android:gravity="right"
    android:textSize="60sp" />
4. 動作確認
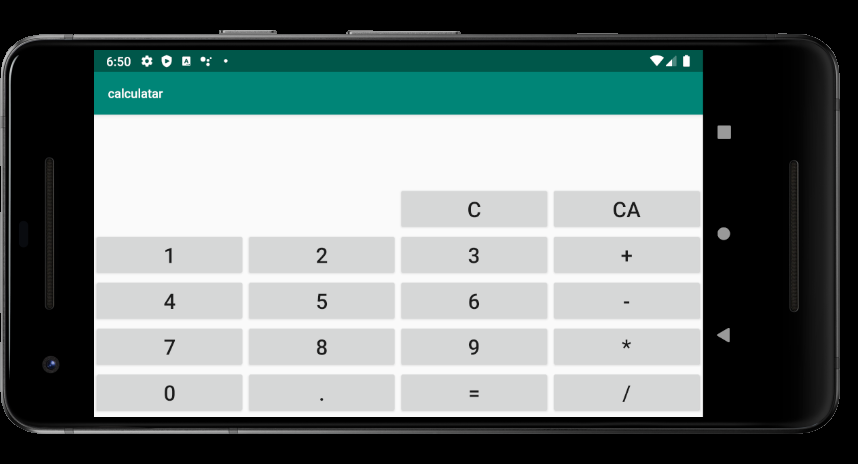
レイアウトのみですが、エミュレーターで確認しておきましょう!


画面サイズに合わせるように作ったので横向きでも
綺麗に並んでいます!
本日はここまでです!次回は処理を実装していきます!
お疲れさまでした!